How to format a column via Power Automate
A lot of times you get really interesting questions in communities. That’s one of the reason I decided to help out more. One of them was how to add custom column formatting in SharePoint Online via the REST API within Power Automate.
Column Formatting
In this example I will try and show you how you can add colours to options of a choice field in a SharePoint list. Normally this is something you can easily achieve via the Design Mode or the Advanced Mode editor in JSON. There are a lot of nice examples in this Use column formatting to customize SharePoint article.
In our example we will try and add a Food Choice column with three choice options: Pizza, Burger and Sushi. Each option will have it’s own custom column like below.
However, like asked in this thread, we want to automate the deployment of this. Obviously there are other techniques out there like PnP Provisioning. But in this article I will focus on using Power Automate to deploy the choice field with column formatting.
REST API to the rescue
After a bit of research I found the CreateFieldAsXml option for the creation of fields. By analyzing some manually steps and using the Developer toolbar of my browser I found the body for the POST request and the proper syntax for it.
This is the original foodchoicefieldcustomformatting.json file I am using for the example. The difference within Power Automate is that we are encoding that so that the body accepts it as valid and add some metadata to it.
The setup
1. Start with a new instant flow with a Manually trigger a flow trigger action.
2. Add a Send an HTTP request to SharePoint action. Use the POST method and use /_api/web/lists/getByTitle(‘ListName”)/fields/CreateFieldAsXml in the URI field.
3. Add the following thing to the Body field. Notice that I am using seperate variables for the three labels (ChoiceOne, Pizza) and for the three colours (ChoiceColorOne, sp-css-backgroundColor-red). I also added a variable for the choice field name.
| {"parameters": | |
| {"__metadata": | |
| {"type":"SP.XmlSchemaFieldCreationInformation"}, | |
| "SchemaXml":"<Field CustomFormatter='{"elmType":"div","style":{"flex-wrap":"wrap","display":"flex"},"children":[{"elmType":"div","style":{"box-sizing":"border-box","padding":"4px 8px 5px 8px","display":"flex","border-radius":"16px","height":"24px","align-items":"center","white-space":"nowrap","overflow":"hidden","margin":"4px 4px 4px 4px"},"attributes":{"class":{"operator":":","operands":[{"operator":"==","operands":["@currentField","@{variables('ChoiceOne')}"]},"@{variables('ChoiceColorOne')}",{"operator":":","operands":[{"operator":"==","operands":["@currentField","@{variables('ChoiceTwo')}"]},"@{variables('ChoiceColorTwo')}",{"operator":":","operands":[{"operator":"==","operands":["@currentField","@{variables('ChoiceThree')}"]},"@{variables('ChoiceColorThree')}",{"operator":":","operands":[{"operator":"==","operands":["@currentField",""]},"","sp-field-borderAllRegular sp-field-borderAllSolid sp-css-borderColor-neutralSecondary"]}]}]}]}},"children":[{"elmType":"span","style":{"line-height":"16px","height":"14px"},"attributes":{"iconName":{"operator":":","operands":[{"operator":"==","operands":["@currentField","@{variables('ChoiceOne')}"]},"",{"operator":":","operands":[{"operator":"==","operands":["@currentField","@{variables('ChoiceTwo')}"]},"",{"operator":":","operands":[{"operator":"==","operands":["@currentField","@{variables('ChoiceThree')}"]},"",{"operator":":","operands":[{"operator":"==","operands":["@currentField",""]},"",""]}]}]}]}}},{"elmType":"span","style":{"overflow":"hidden","text-overflow":"ellipsis","padding":"0 3px"},"txtContent":"@currentField","attributes":{"class":{"operator":":","operands":[{"operator":"==","operands":["@currentField","@{variables('ChoiceOne')}"]},"",{"operator":":","operands":[{"operator":"==","operands":["@currentField","@{variables('ChoiceTwo')}"]},"",{"operator":":","operands":[{"operator":"==","operands":["@currentField","@{variables('ChoiceThree')}"]},"",{"operator":":","operands":[{"operator":"==","operands":["@currentField",""]},"",""]}]}]}]}}}]}],"templateId":"BgColorChoicePill"}' DisplayName='@{variables('ChoiceColumnName')}' FillInChoice='FALSE' Format='Dropdown' IsModern='TRUE' Name='@{variables('ChoiceColumnName')}' Title='@{variables('ChoiceColumnName')}' Type='Choice'><CHOICES><CHOICE>@{variables('ChoiceOne')}</CHOICE><CHOICE>@{variables('ChoiceTwo')}</CHOICE><CHOICE>@{variables('ChoiceThree')}</CHOICE></CHOICES></Field>", | |
| "Options":12 | |
| } | |
| } |
4. Run the Power Automate Flow and check the list you have added your column to.
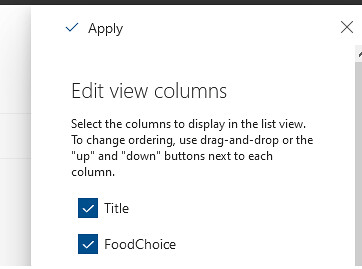
5. Use the show/hide columns option

6. Add your column to your preferred view

7. Use the edit in grid view to see your formatting in action.

I want different colours
Obviously I can imagine you want to use different colours in your setup. Have a look at this site with all the Reusable SharePoint Online Classes for Modern UI by Denis Molodtsov. In my example I was using sp-css-backgroundColor-red for Pizza, sp-css-backgroundColor-green for Burger and sp-css-backgroundColor-yellow for Sushi.
That should be it with the setup. Start testing and let me know if this was useful.
Happy testing!


 by
by 


A lifesaver – thanks!
Hi,
How did you get from foodchoicefieldcustomformatting.json to the actual CustomerFormatter data ?
thx,
rudi
Hi Rudi,
I found that json in the developer toolbar (network tab) of my browser after manually applying the same formatting in the interface.
Hi
How do you select the column foodchoice in powerautomate ? Thks
Hi Marc,
In this article we are only creating the column from scratch. If you want to select it you could use a get items/get item action. After that the column should be available in the dynamic content list as foodchoice or foodchoice value.
Hi Dennis,
I Implemented this just as you suggested, but i get the response that the attribute “_metadata” does not exist. Do you have any idea what I am doing wrong?
Hi Sabrina,
Can you check if you are using two underscore characters in the metadata attribute name? It should be __metadata instead of _metadata.
Hi Dennis, could you please elaborate on how you got the Custom Formatter data from the Developer section of your browser? I have a formatted column, but I’m stumped at getting that code.
This is just what I’ve been looking for! I’m not familiar with this level of coding and need to add more column choices. Where and how can I go about this? I tried on my own but without any luck. Thank you!
does the customformatter code have to be in >, <, "e; format or can it utilize in .” ? If utilizing the latter, do you have to replace() the values for each “with escaped versions (i.e. “\”)
Hi Dennis
Thank you for the excellent article. I really appreciate the effort you put in!
Do you know if it is possible to apply the custom format to an existing column in a similar way using the API?
Best wishes
Simon