Publish table on SharePoint page
SharePoint Online pages have the capability to use tables to present information. In this article I will show you how you can format the Create HTML table action output to a SharePoint Online table in a Power Automate flow.
Setting the scene
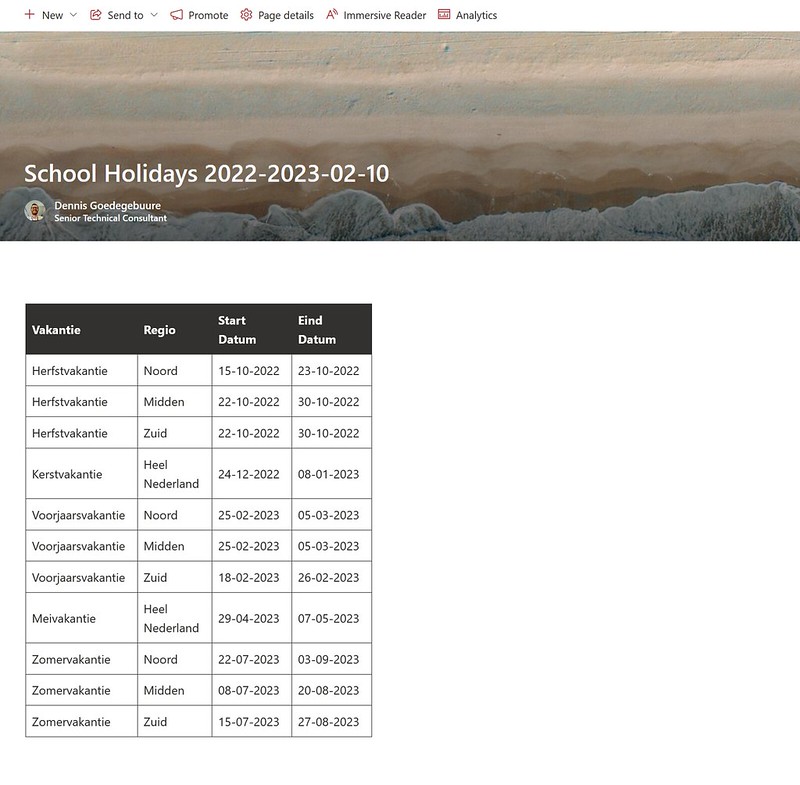
In this example I want to create a page which shows the Dutch School holidays of the current school year in a table on a SharePoint page. That page will be created via a Power Automate flow and will use the Rijksoverheid independent publisher connector I published back in June 2022.
Comparing Tables
After some test runs with some manually created pages I figured out that the main challenge would be the table formatting. Let’s have a look at the Create HTML table action format versus the SharePoint Online page format.
As you can see the main difference is that SharePoint Online does not use the thead tag, the headers use a role attribute in the td tag instead of a th tag and you can also specify a class in a table tag.
Nested functions vs Loop
To reformat it into the correct html for the SharePoint Online page I had two possible approaches in mind.
A. Nested functions in an expression.
Use a couple of replace functions and nest them to replace everything you want. Can look a bit messy and harder to read.
B. Use an array to loop through every replace action
Easier to read, does require more actions within your flow.
I decided to go for option B this time.
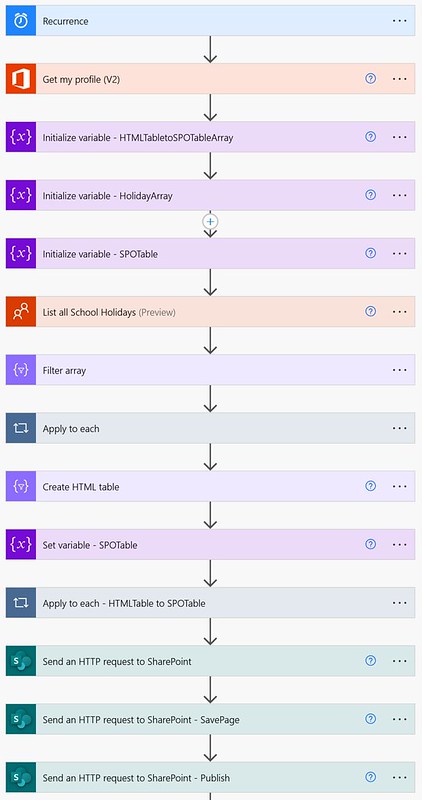
Flow setup
This example uses an Independent publisher connector which is a premium feature.
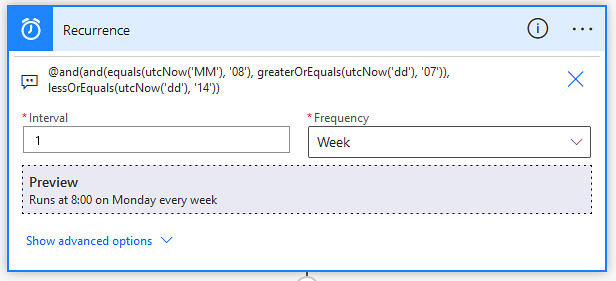
1. Add a Recurrence trigger a flow action.
This flow will run once a year on Monday in August between the 7th and the 14th at 08:00. The frequency is set to weekly to keep the flow active. Trigger condition will make sure it only runs once a year.
a. Select an Interval, in this setup 1
b. Select the Frequency, in this setup Week
c. Select the Days, in this setup Monday
d. Select the Hours, in this setup 08
e. In the Settings add the following trigger condition.
2. Add a Get my profile (v2) action.
To retrieve my own email for the Author field of the SharePoint page.
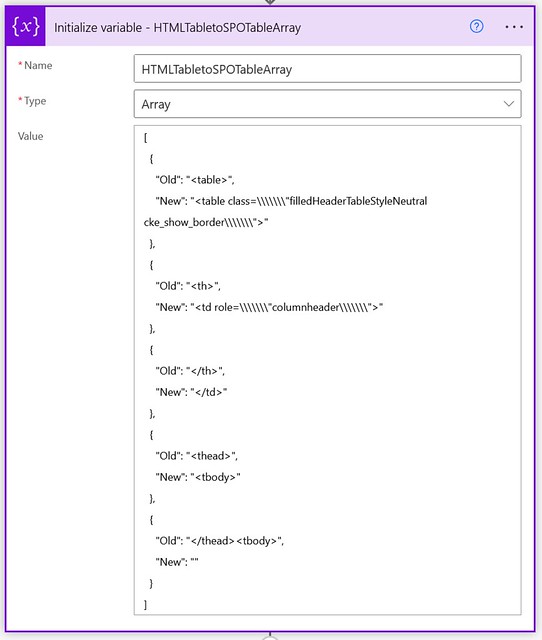
3. Add a Initialize variable action.
a. Provide a Name, in this example HTMLTabletoSPOTableArray
b. Select a Type, Array
c. Provide a Value, use the json from the code snippet below
4. Add a second Initialize variable action.
a. Provide a Name, in this example HolidayArray
b. Select a Type, Array
c. Provide a Value, use []
5. Add a third Initialize variable action.
a. Provide a Name, in this example SPOTable
b. Select a Type, String
c. Provide a Value, leave it empty
6. Add a List all School Holidays action.
a. Use the default values
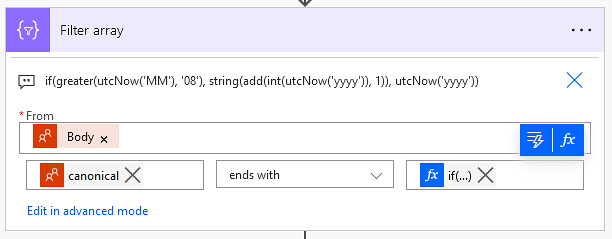
7. Add a Filter Array action.
a. In the From field use the Body of the List all School Holidays action
b. In the Where section use the expression below in the advanced mode
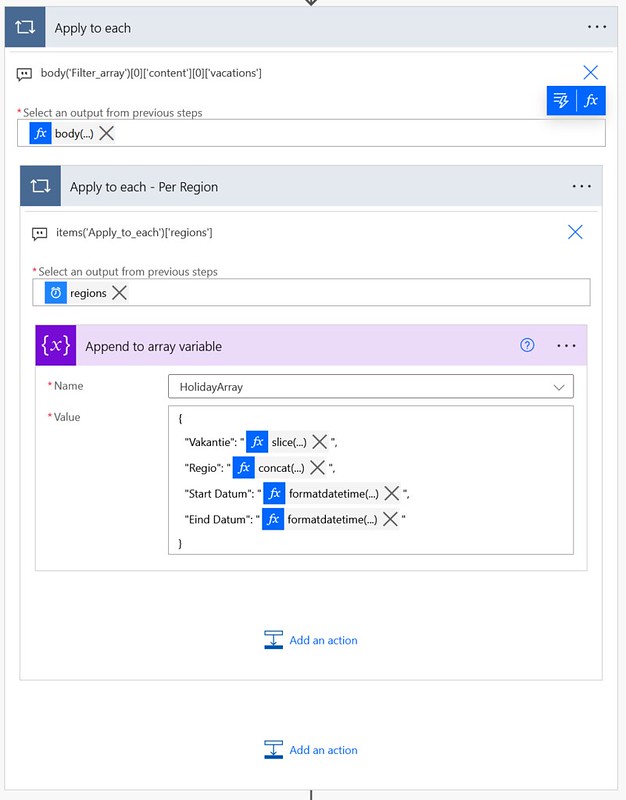
8. Add an Apply to Each action.
a. In the Select an output from previous steps use the expression from the code snippet below
9. Add a second Apply to Each action within that first Apply to Each action.
a. In the Select an output from previous steps use the expression from the code snippet below
10. Add a Append to array variable action within that second Apply to Each action.
a. Select the HolidayArray variable from the dropdown
b. In the Value field use the expression from the code snippet below
11. Add a Create HTML table action (below the Apply to Each action).
a. Use the HolidayArray array variable in the From field.
12. Add a Set Variable action.
a. Select the SPOTable variable from the dropdown
b. Use the output from the Create HTML table action in the Value field.
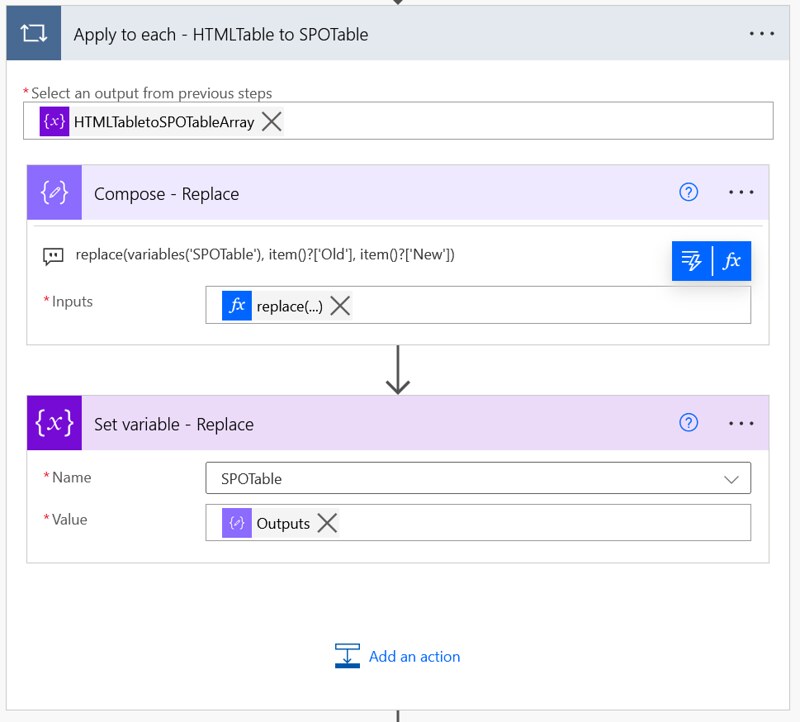
13. Add an Apply to Each action.
a. In the Select an output from previous steps use the HTMLTabletoSPOTableArray variable
14. Add a Compose action.
a. In the Inputs field use the expression from the code snippet below
15. Add a Set Variable action.
a. Select the SPOTable variable from the dropdown
b. Use the output from the Compose action in the Value field.
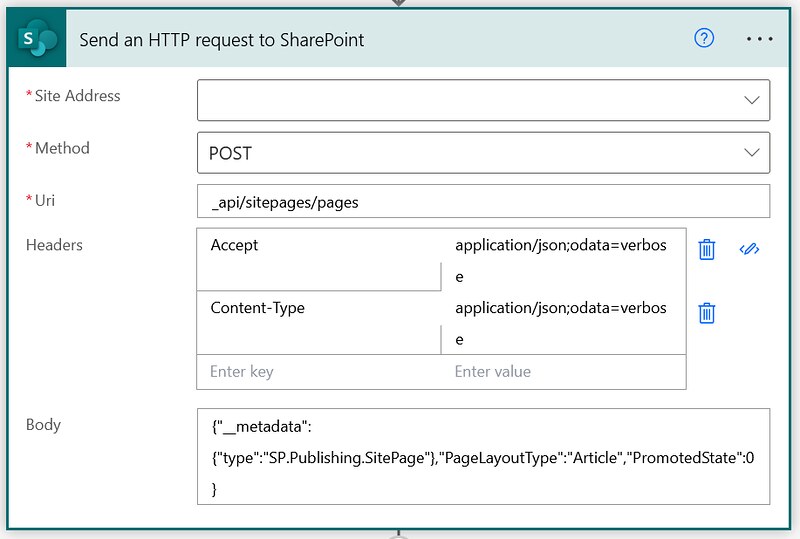
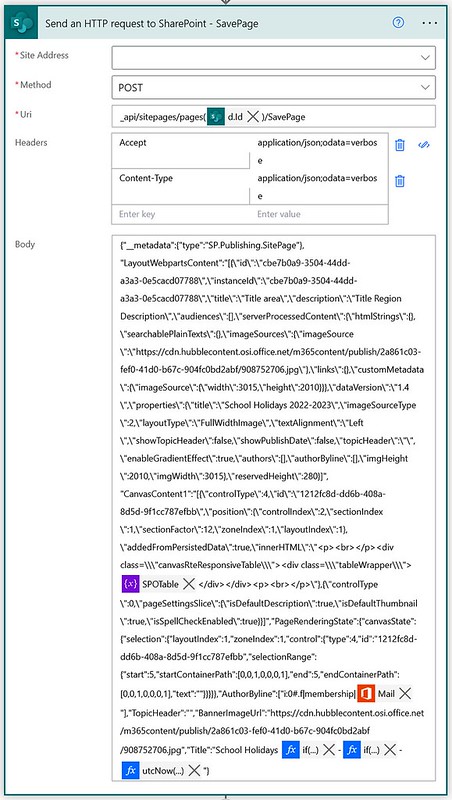
16. Add a Send an HTTP request to SharePoint action.
a. Select your preferred site in the Site Address
b. Use the POST method
c. Use the URI from the code snippet below
d. Use the Headers from the code snippet below
e. Use the Body from the code snippet below
17. Add a second Send an HTTP request to SharePoint action.
a. Select your preferred site in the Site Address
b. Use the POST method
c. Use the URI from the code snippet below
d. Use the Headers from the code snippet below
e. Use the Body from the code snippet below
18. Add a third Send an HTTP request to SharePoint action.
a. Select your preferred site in the Site Address
b. Use the POST method
c. Use the URI from the code snippet below
d. Use the Headers from the code snippet below
That is it for the setup of this example.
Happy testing!
