SharePoint Page with Embed Web Part
In this article I am going to demonstrate how you can create a draft SharePoint page with an embed web part in SharePoint Online via a Power Automate flow.
Kudos to adr55555
First of all kudos to adr55555. We collaborated together on finding a solution for this and adr55555 also spotted an error in my first example. The Publish dynamic document with File Viewer in a SP Page thread can be found on the Power User Community.
Embed Web Part
In this example we are using a document library with source files. We manually trigger a flow for a selected file and use that file to create a SharePoint draft page which embeds the same file.
Press the Create Page button for a selected file, enter a page title

And your SharePoint page gets created, with the file embedded.
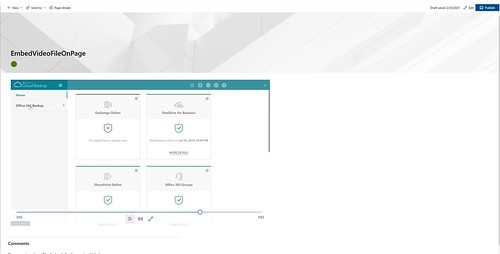
The main steps of this example are:
– Collecting properties from the source site, web and file
– Create destination page
– Checkout destination page
– Save destination page as draft with an embed web part on it
– Creating a button to trigger the flow
For a selected file
1. Add a For a select file trigger action. Select your site and a source document library.
2. Add an Text input. In our example we add a Use the New Page Title as a text input
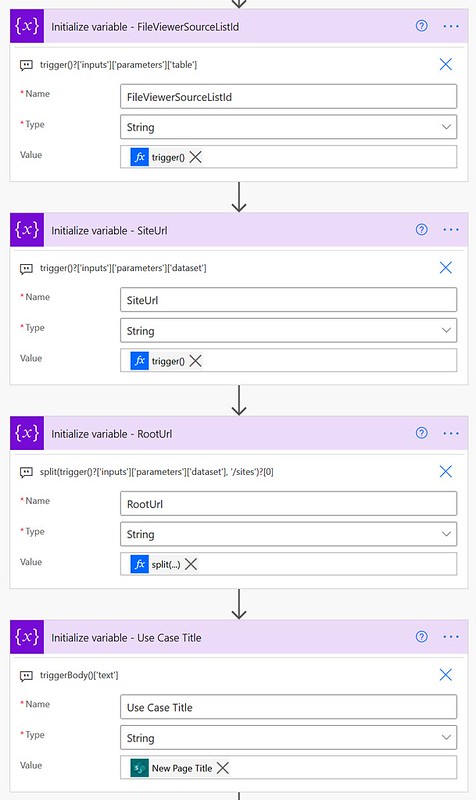
3. Add four Initialize variable actions. All can be of type String. I called them FileViewerSourceListId, SiteUrl, RootUrl, Use Case Title. Use the following expressions for them (the same order).
4. Add a Send an HTTP request to SharePoint action – SiteId. Use the SiteUrl variable for the Site Address. Use the _api/site/id for the Uri. This is to retrieve the SiteId
5. Add a Send an HTTP request to SharePoint action – WebId. Use the SiteUrl variable for the Site Address. Use the _api/web/id for the Uri. This is to retrieve the WebId
6. Add two Initialize variable actions. All can be of type String. Use the following expressions for them.
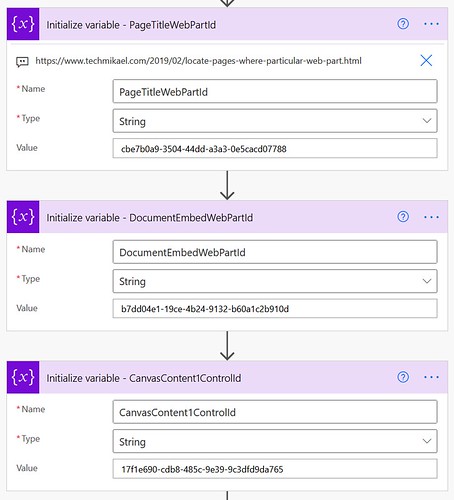
7. Add another three Initialize variable actions. All can be of type String. I found the Web Part ids in the Locate pages where a particular web part is being using on modern SharePoint sites blog from Mikael Svenson.
PageTitleWebPartId – cbe7b0a9-3504-44dd-a3a3-0e5cacd07788
DocumentEmbedWebPartId – b7dd04e1-19ce-4b24-9132-b60a1c2b910d
CanvasContent1ControlId – 17f1e690-cdb8-485c-9e39-9c3dfd9da765
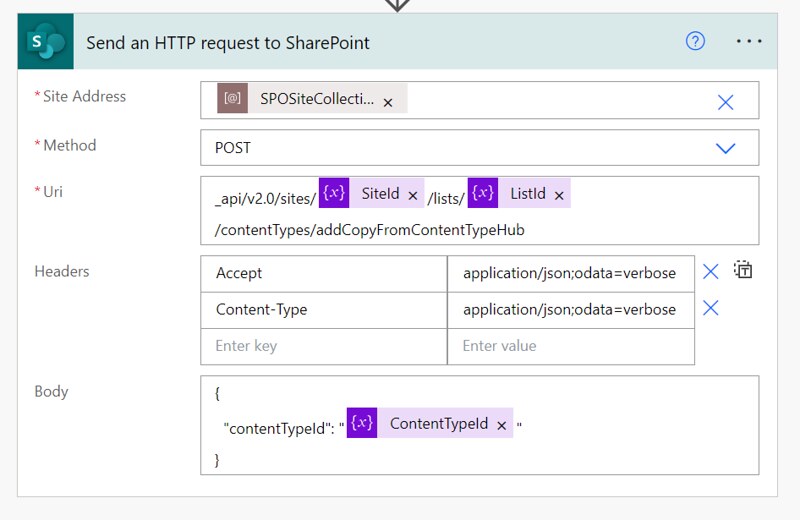
8. Add a Send an HTTP request to SharePoint action. Use the SiteUrl variable for the Site Address. This one is a POST request. It is to create a new page.
9. Add a Parse Json action. Use the body from the previous Send an HTTP request to SharePoint action in the Content field. Use the following schema.
10. Add a Send an HTTP request to SharePoint action – CheckOutPage. Use the SiteUrl variable for the Site Address. This one is a POST request. It is to checkout the new page.
11. Add a Get file properties action. Use the SiteUrl variable for the Site Address. Use the FileViewerSourceListId for the Library Name. Use the ID field from the trigger action.
12. Add a Get file metadata action. Use the SiteUrl variable for the Site Address. Use the Identifier from the Get file properties action.
13. Add a final Send an HTTP request to SharePoint action – SavePageAsDraft. Use the SiteUrl variable for the Site Address. This will add the embed web part with the source file to the page. It will be save as a draft page. Use the settings below for the rest of the configuration.
Create Page Button
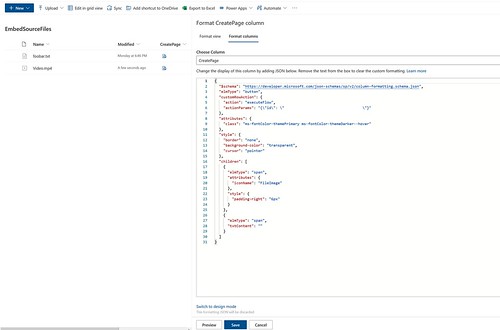
1. Create a new single line of text column in the source document library. In my example I have named it CreatePage.
2. Click Column Settings, Format this Column, Advanced Mode. Past in the following json
Happy testing!

